Users with the Create Schedules role can use the schedules functionality in Ontrack Staff Hub.
Use schedule functionality to:
-
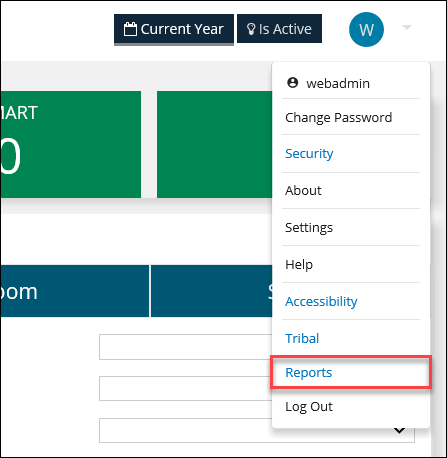
Select the Reports option in the menu.
The Reports screen is displayed.
-
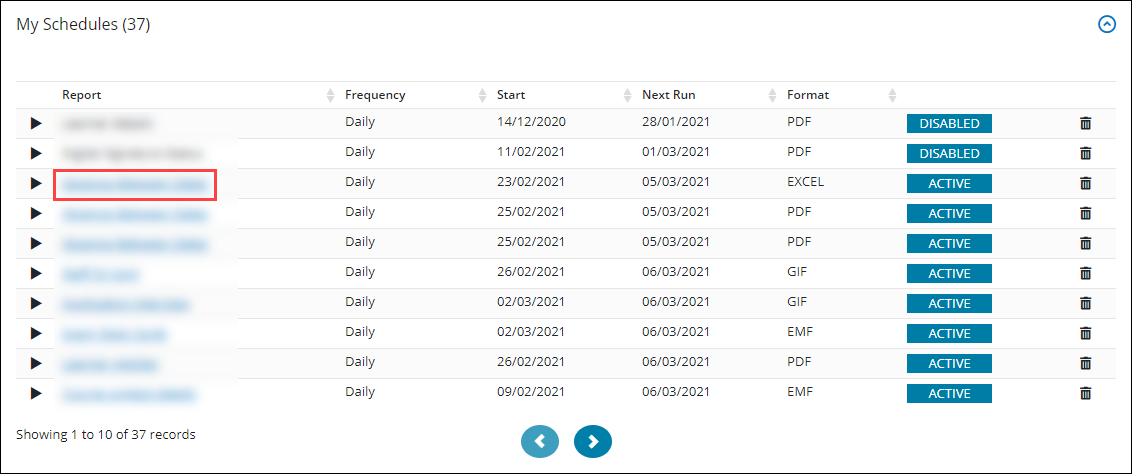
Select the Schedules option in the left-hand menu.
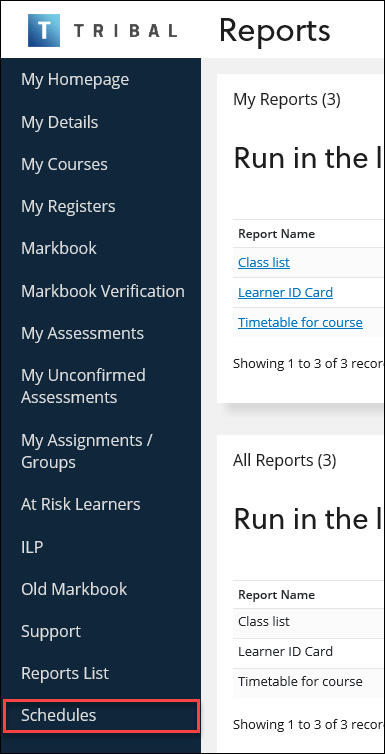
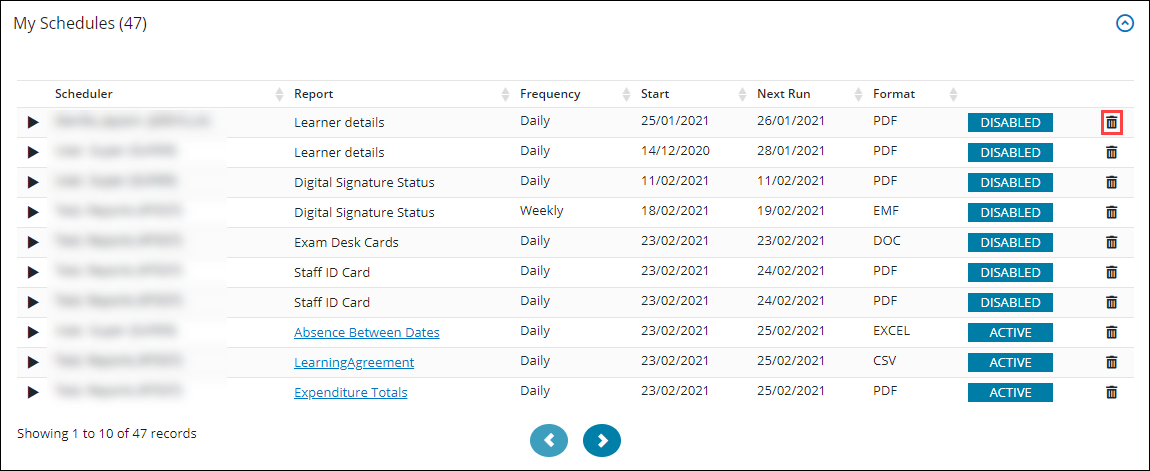
The Schedules screen is displayed. The user's schedules are displayed in the My Schedules section.
 Important.Users with the Report Administrator role are able to view all scheduled reports within the All Schedules section.
The fields on the Schedule screen are described in the following table.
| This field | Holds this information... |
|---|---|
| Report | The scheduled report name. |
| Frequency | The schedule frequency (for example: daily, monthly or weekly). |
| Start | The date the first scheduled run date. |
| Next Run | The next scheduled run date. |
| Format | The report format (for example: PDF, DOC and so on). |
| Status | Whether the schedule is active or disabled. |
| Delete | Whether to delete the schedule. |
-
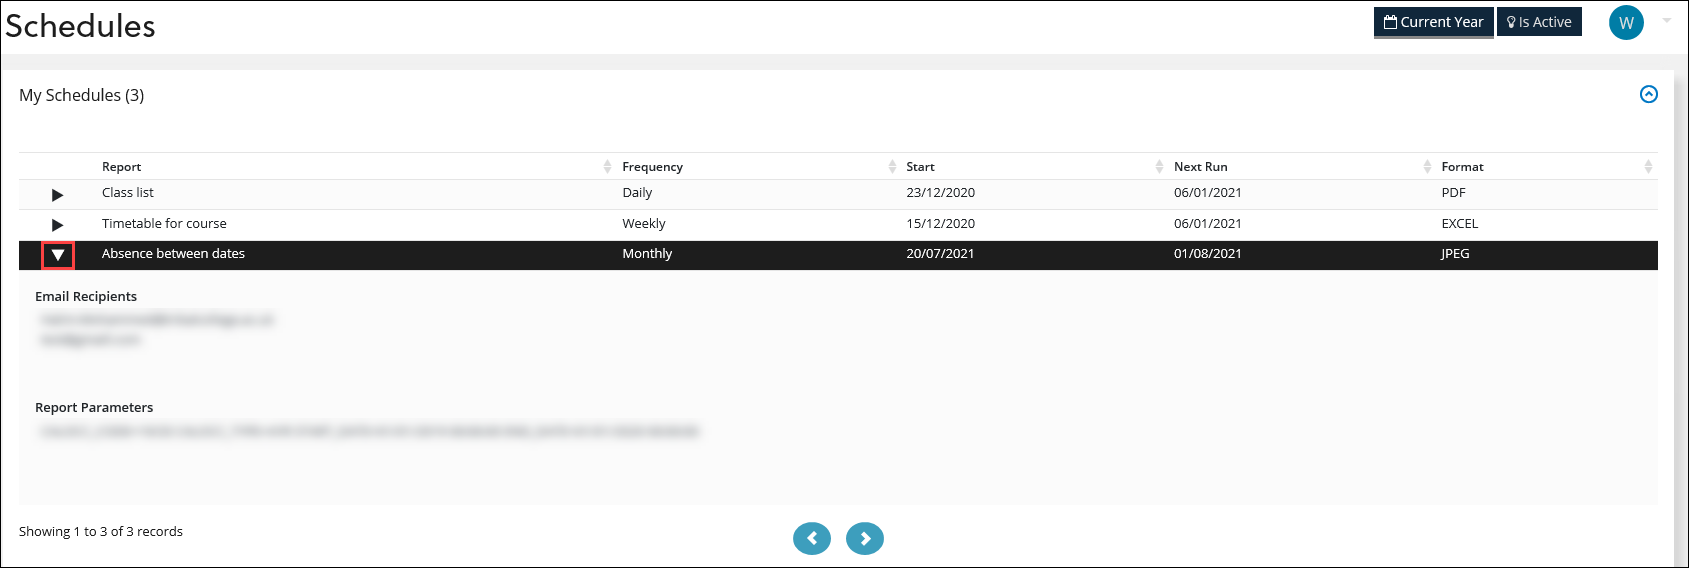
Select the Show/hide extra details button to view more schedule information.
-
Navigate to the Reports screen, accessed from the Reports option in the menu.
The Reports screen is displayed.


-
Select the Create Schedule button adjacent to the relevant report.
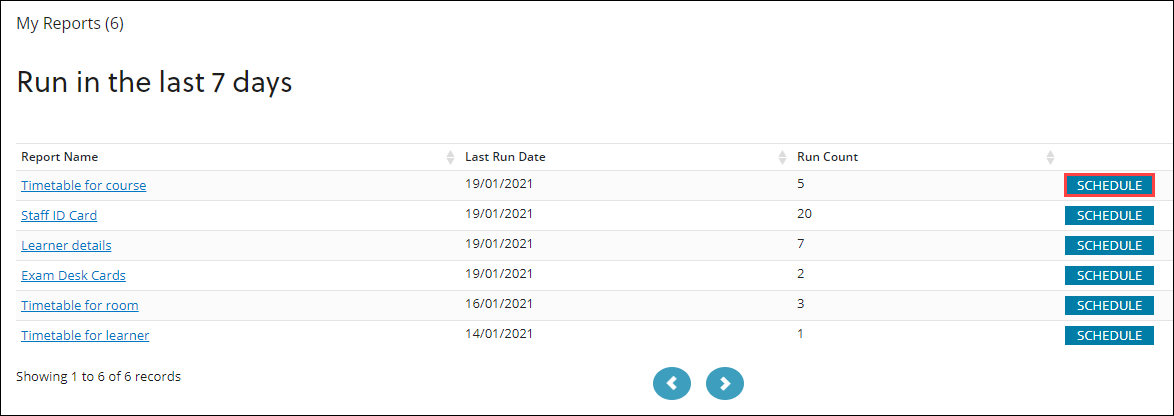
The Create Schedule screen is displayed.
-
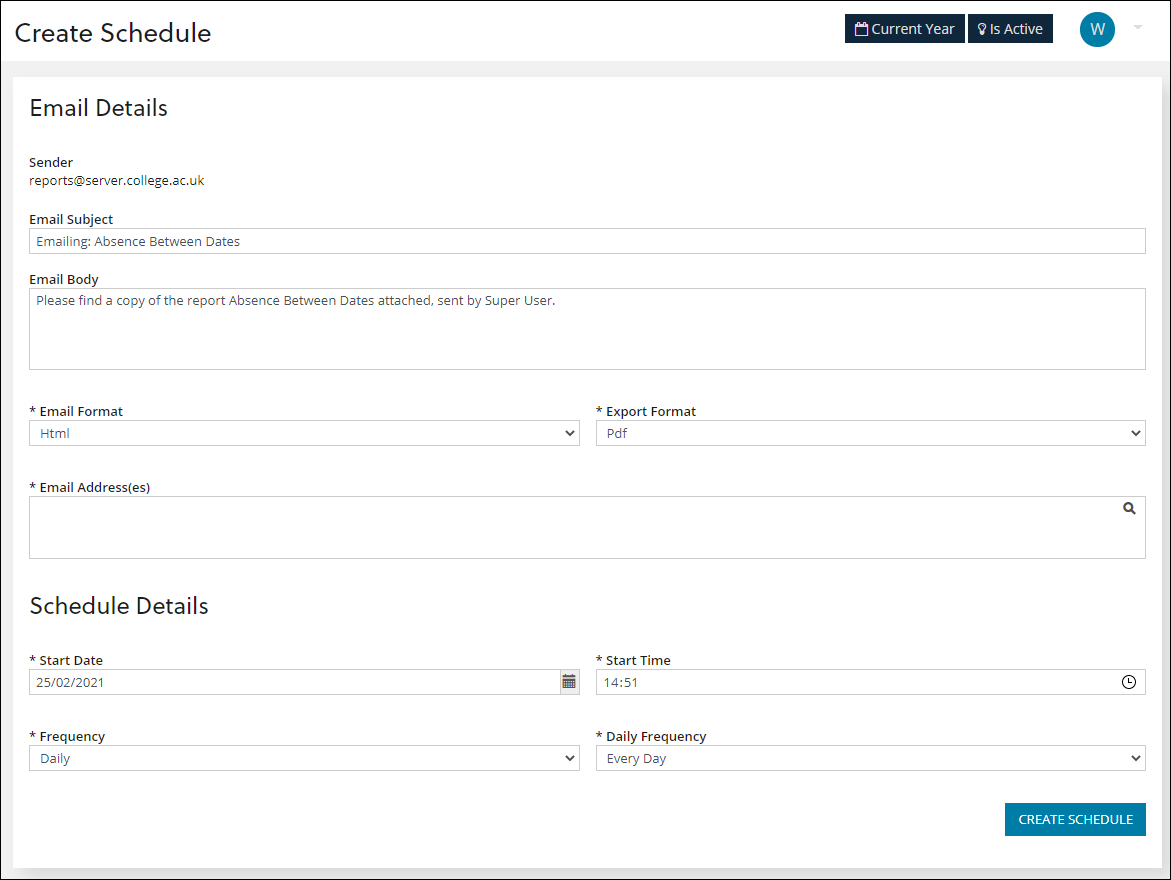
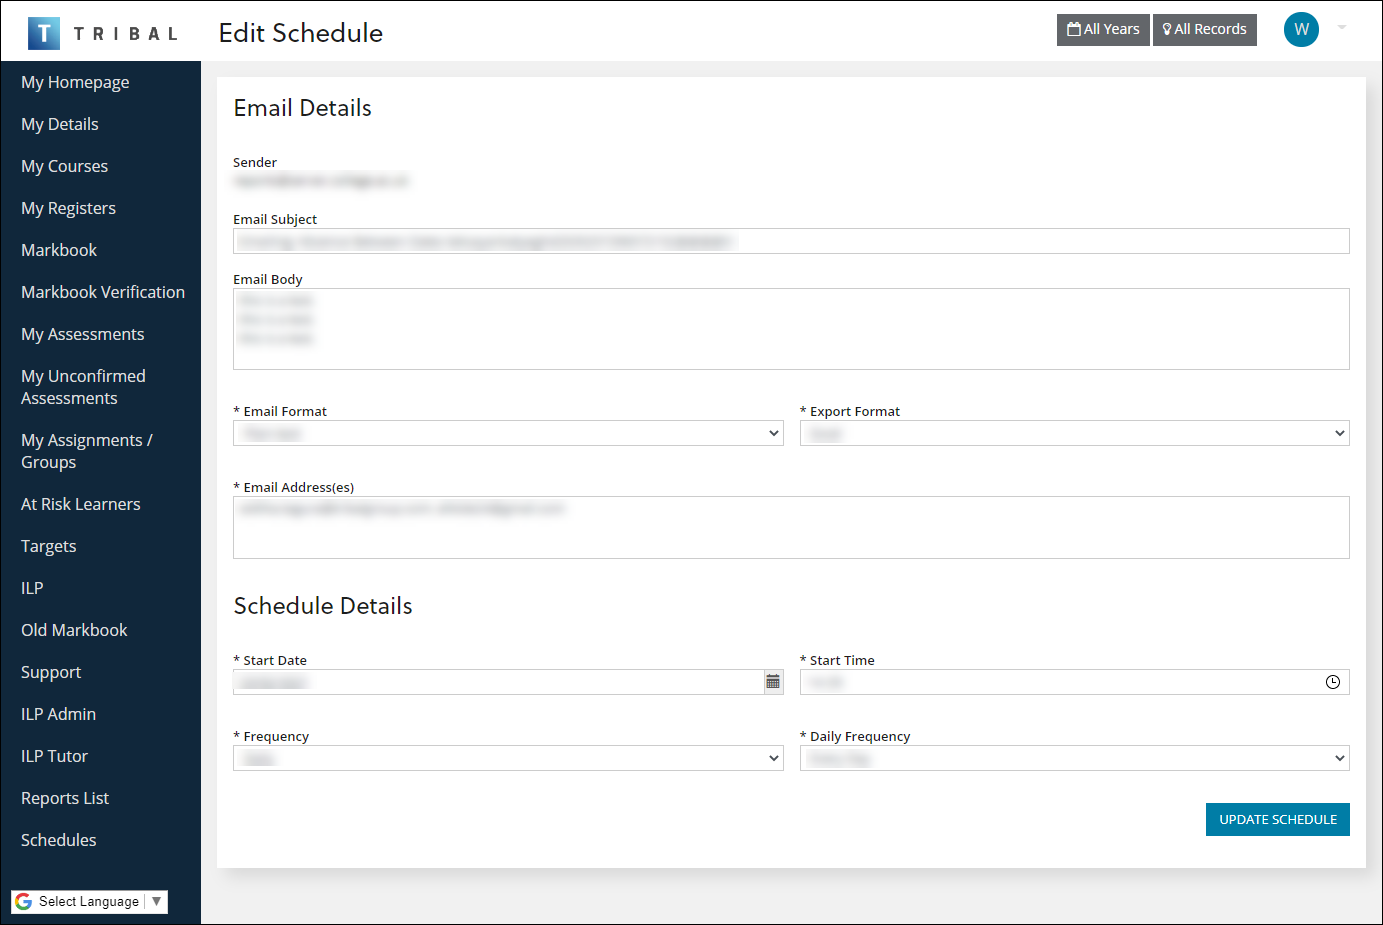
Enter the relevant information.
The fields on the Create Schedule screen are described in the following table.
| This field | Holds this information... |
|---|---|
| Sender | The sender's email address. |
| Email Subject | The email subject. |
| Email Body | The email body text. |
| Email Format | The email format. Select from the drop-down list. |
| Export Format | The export format. Select from the drop-down list. |
| Email Address(es) | The email recipient(s). |
| Start Date | The scheduled start date. |
| Start Time | The scheduled start time. |
| Frequency | The frequency. Select from the drop-down list. |
| Daily/Montly/Weekly Frequency |
The day, month or week frequency. The fields displayed are determined by the Frequency field option. |
-
Select the Create Schedule button.
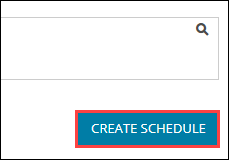
The Schedules screen is displayed with the new record added or existing record amended.
You can edit an existing schedule with an Active status.
To edit a schedule with an Active status:
-
Select the relevant schedule from the Schedules screen and select the Edit schedule button.
The Edit Schedule screen is displayed.
-
Edit the relevant fields.
-
Select Update Schedule .
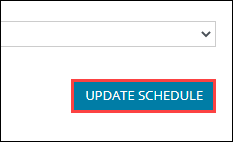
The schedule is updated.
You can delete, disable or enable schedules with the Schedules screen: